有一个nanopi放在家中做vpn用,是基于ubuntu环境搭建的ipsec l2tpvpn,一直没有做总结。以至于快忘记了,这里总结一下以便日后温故。
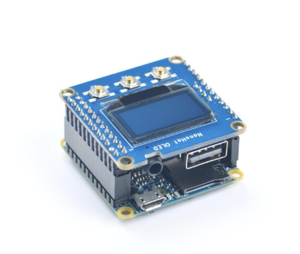
我的nanopi+led hat
NanoPi NEO2是友善之臂团队推出的全新一代超小型ARM计算机,它采用全志64位四核A53处理器H5, 内置六核Mail450 GPU, 标配512M DDR3内存(可选1GB),可支持运行Ubuntu Core,Armbian等嵌入式操作系统。NEO2小巧精致,见图。
ubuntu的安装
下载需要的固件文件(officail-ROMs目录)和烧写工具(tools目录):
使用以下固件:
nanopi-neo2_sd_friendlycore-xenial_3.10_arm64_YYYYMMDD.img.zip
基于UbuntuCore构建的系统固件,使用Linux-3.10内核
nanopi-neo2_sd_friendlycore-xenial_4.14_arm64_YYYYMMDD.img.zip
基于UbuntuCore构建的系统固件,使用Linux-4.14内核
nanopi-neo2_sd_friendlywrt_4.14_arm64_YYYYMMDD.img.zip
基于OpenWrt构建的系统固件,使用Linux-4.14内核
烧写工具:
win32diskimager.rar Windows平台下的系统烧写工具,Linux平台下可以用dd命令烧写系统,Macos可以用balena etcher。
固件下载地址:
http://download.friendlyarm.com/nanopineo2
安装好后,启动引导。
默认密码为:pi:pi root:fa
使用IPsec VPN服务器自动设置脚本
参考 https://github.com/hwdsl2/setup-ipsec-vpn
wget https://git.io/vpnsetup -O vpnsetup.sh && sudo sh vpnsetup.sh
<p>
发现脚本启动fail2ban.service服务时报错。
用journalctl -xe查看问题所在
root@NanoPi-NEO2:~# journalctl -xe
-- Unit fail2ban.service has failed.
--
-- The result is failed.
Sep 30 00:55:12 NanoPi-NEO2 systemd[1]: fail2ban.service: Unit entered failed state.
Sep 30 00:55:12 NanoPi-NEO2 systemd[1]: fail2ban.service: Failed with result 'exit-code'.
Sep 30 00:55:13 NanoPi-NEO2 systemd[1]: fail2ban.service: Service hold-off time over, scheduling restart.
Sep 30 00:55:13 NanoPi-NEO2 systemd[1]: Stopped Fail2Ban Service.
-- Subject: Unit fail2ban.service has finished shutting down
-- Defined-By: systemd
-- Support: http://lists.freedesktop.org/mailman/listinfo/systemd-devel
--
-- Unit fail2ban.service has finished shutting down.
Sep 30 00:55:13 NanoPi-NEO2 systemd[1]: Starting Fail2Ban Service...
-- Subject: Unit fail2ban.service has begun start-up
-- Defined-By: systemd
-- Support: http://lists.freedesktop.org/mailman/listinfo/systemd-devel
--
-- Unit fail2ban.service has begun starting up.
Sep 30 00:55:13 NanoPi-NEO2 fail2ban-client[4371]: ERROR No file(s) found for glob /var/log/auth.log
Sep 30 00:55:13 NanoPi-NEO2 fail2ban-client[4371]: ERROR Failed during configuration: Have not found any log file
Sep 30 00:55:13 NanoPi-NEO2 systemd[1]: fail2ban.service: Control process exited, code=exited status=255
Sep 30 00:55:13 NanoPi-NEO2 systemd[1]: Failed to start Fail2Ban Service.
-- Subject: Unit fail2ban.service has failed
-- Defined-By: systemd
-- Support: http://lists.freedesktop.org/mailman/listinfo/systemd-devel
--
-- Unit fail2ban.service has failed.
--
-- The result is failed.
Sep 30 00:55:13 NanoPi-NEO2 systemd[1]: fail2ban.service: Unit entered failed state.
Sep 30 00:55:13 NanoPi-NEO2 systemd[1]: fail2ban.service: Failed with result 'exit-code'.
Sep 30 00:55:14 NanoPi-NEO2 systemd[1]: fail2ban.service: Service hold-off time over, scheduling restart.
Sep 30 00:55:14 NanoPi-NEO2 systemd[1]: Stopped Fail2Ban Service.
-- Subject: Unit fail2ban.service has finished shutting down
-- Defined-By: systemd
-- Support: http://lists.freedesktop.org/mailman/listinfo/systemd-devel
--
-- Unit fail2ban.service has finished shutting down.
Sep 30 00:55:14 NanoPi-NEO2 systemd[1]: fail2ban.service: Start request repeated too quickly.
Sep 30 00:55:14 NanoPi-NEO2 systemd[1]: Failed to start Fail2Ban Service.
-- Subject: Unit fail2ban.service has failed
-- Defined-By: systemd
-- Support: http://lists.freedesktop.org/mailman/listinfo/systemd-devel
--
-- Unit fail2ban.service has failed.
--
-- The result is failed.
Sep 30 01:00:01 NanoPi-NEO2 CRON[4403]: pam_unix(cron:session): session opened for user root by (uid=0)
Sep 30 01:00:01 NanoPi-NEO2 CRON[4404]: (root) CMD ( /bin/bash /usr/bin/sync_ntp_rtc.sh /dev/rtc0)
Sep 30 01:00:03 NanoPi-NEO2 CRON[4403]: (CRON) info (No MTA installed, discarding output)
Sep 30 01:00:03 NanoPi-NEO2 CRON[4403]: pam_unix(cron:session): session closed for user root
root@NanoPi-NEO2:~# cat /var/log/auth.log
cat: /var/log/auth.log: No such file or directory
最终发现没有auth.log生成,导致服务启动失败,那就touch一个吧。
root@NanoPi-NEO2:~# touch /var/log/auth.log
问题解决。
一些安装中的补充:
Ubuntu & Debian
首先,更新你的系统: 运行 apt-get update && apt-get dist-upgrade 并重启。这一步是可选的,但推荐。
要安装 VPN,请从以下选项中选择一个:
选项 1: 使用脚本随机生成的 VPN 登录凭证 (完成后会在屏幕上显示):
wget https://git.io/vpnsetup -O vpnsetup.sh && sudo sh vpnsetup.sh
选项 2: 编辑脚本并提供你自己的 VPN 登录凭证:
wget https://git.io/vpnsetup -O vpnsetup.sh
nano -w vpnsetup.sh
[替换为你自己的值: YOUR_IPSEC_PSK, YOUR_USERNAME 和 YOUR_PASSWORD]
sudo sh vpnsetup.sh
注: 一个安全的 IPsec PSK 应该至少包含 20 个随机字符。
选项 3: 将你自己的 VPN 登录凭证定义为环境变量:
# 所有变量值必须用 '单引号' 括起来
# *不要* 在值中使用这些字符:  \ " '
wget https://git.io/vpnsetup -O vpnsetup.sh && sudo \
VPN_IPSEC_PSK='你的IPsec预共享密钥' \
VPN_USER='你的VPN用户名' \
VPN_PASSWORD='你的VPN密码' \
sh vpnsetup.sh
注: 如果无法通过 wget 下载,你也可以打开 vpnsetup.sh (或者 vpnsetup_centos.sh),然后点击右方的 Raw 按钮。按快捷键 Ctrl-A 全选, Ctrl-C 复制,然后粘贴到你喜欢的编辑器。
宝塔面板php无法安装问题
apt-get install curl
apt-get install libcurl4-gnutls-dev
apt-get install libmcrypt4 libmcrypt-dev```